Digital Ocean Run Ghost Setup Again Within a Folder
Photo past chuttersnap on Unsplash
You lot can admittedly do this tutorial still only you might desire to cull a bigger Droplet than the $5 one listed beneath. I ran into the effect when attempting to upgrade Ghost. I merely thought you should know earlier y'all get too deep into this tutorial.
Don't Run Multiple Ghost Instances on a Small-scale Virtual Machine
I found out the "hard way" why most people only host one Ghost instance on a DigitalOcean droplet. This is why they are called experiments.
 Darren Beattie

Then the first time I set upwards darrenbeattie.com on DigitalOcean I fabricated some mistakes. It worked but using the DigitalOcean one-click set up for the initial weblog made information technology difficult to add additional domains.
I spent several days trying to go far work and I finally found an article that sort of detailed what I wanted to practise. Sadly, the easiest solution was to blow upwards an existing droplet and create a new i.
The nice matter near $5 aerosol is that they give yous an cheap way to play. Sadly during my web evolution bootcamp I did not acquire a ton about servers and deployment. I tin can lawmaking, but getting it upwards on a Ubuntu/Nginx server all by myself?
That's new...
I'm going to condense and update that article for you lot in my own words to give yous a fiddling more particular/specifics.
What To Practise
I'm going to assume you accept purchased your domain(s).
The majority of registrars only have adept rates for a year, then the fees climb a ton. I had i domain climb to $50+ a year to continue. Others nickel and dime you until you lot end up paying triple or quadruple their initial offer.
I recently moved all of my domain names over to Google Domains (GD) for this reason.
As a Canadian it's a $17 CAD flat charge per unit with private registration and it's very piece of cake to use without all the annoying upsells of nearly every other provider (GoDaddy, HostGator, BlueHost, etc...) I've used in the past.
It's a good sign if I'grand telling yous that and I don't go any referral $$ for sharing that info with you. That'south how annoying I've found well-nigh every other registrar prior to GD.
Pace #1 - Sign Up For DigitalOcean
You should have some basic understanding every bit to how the terminal works on either a mac, linux or a windows machine.
You can sign upwardly hither. And if you exercise, this fourth dimension I volition get a referral bonus of $25 but you'll also get $100 worth of credit for 60 days or two free months if you cull the $5 droplet and I don't run into why y'all wouldn't.
Unless you already have a gigantic audience the $5 droplet will easily handle most of the traffic of a small blog. I spent the actress $1 a month for weekly backups but you don't have to if yous don't desire to.
At the time of writing the process looked like this:
- Pick the Ubuntu xviii.04 pick for your distribution
- Option 'standard'
- Scroll left for the $5 droplet.
- Cull your location (I chose Toronto because as I said, I'm Canadian)
- I didn't choose whatsoever additional options just that's upward to you
- I set upward SSH authentication (mentioned below, DO will walk you through it)
- You probably simply need the 1 droplet
- Cull a hostname
- Add any tags you think are relevant
- Select the project (you'll need to create one if you oasis't already)
- I added backups, you don't take to, merely it's $1 a calendar month on a $5 droplet
- Double check your selections and click create droplet
Yes, I become a boot-back this time, only like to GD, DigitalOcean (DO) has an upfront no-BS approach to business. Information technology's a simple service without the incessant upsells. Nosotros used them when we were running Koachable years agone and they helped united states of america easily scale when we needed to.
Yous tin utilise AWS or Google Cloud or Azure if you want, they are often free for the first year but and then they tin get expensive quickly past that. Those services tend to serve medium to larger sized businesses well but not tiny startups. We actually switched from AWS in 2014 to DO for this reason. I'm sure Practise is more expensive when your traffic is huge but for now mine isn't.
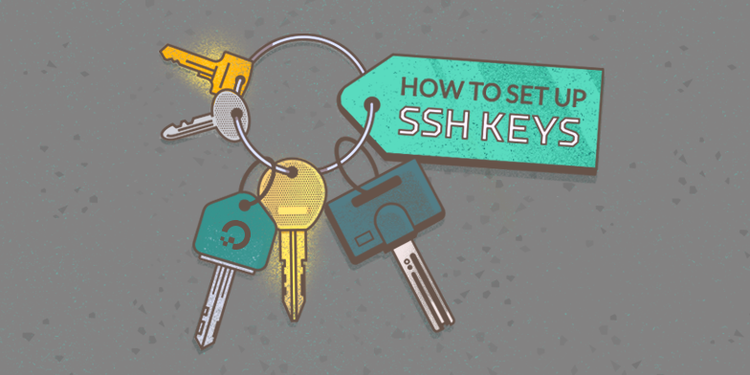
I think it's wise to prepare SSH for your droplet, but that's just me. It'south more than secure and it's annoying to type in your countersign every time you want to admission your droplet (AKA virtual private server). For more on that...
How to Prepare SSH Keys on Ubuntu eighteen.04 | DigitalOcean
SSH-fundamental-based authentication provides a more secure culling to password-based authentication. In this tutorial we'll learn how to gear up SSH primal-based authentication on an Ubuntu xviii.04 installation.
![]() DigitalOcean
DigitalOcean
Although y'all may still want to utilize a passphrase from your favourite password manager, and then you'll yet be entering a password when you first login to your server each time.
Step #2 - Betoken Your DigitalOcean Nameservers To your Registrar
You'll accept to point your DigitalOcean Nameservers to whatsoever provider you choose and y'all can read the following for more on that:
How To Point to DigitalOcean Nameservers From Common Domain Registrars | DigitalOcean
DNS is the naming organization that is used to bind a domain proper name to a web server. In this guide, nosotros will modify the nameservers for a domain that nosotros have registered and point it to a DigitalOcean Droplet.
![]() DigitalOcean
DigitalOcean

Basically y'all need to add these custom NS's under the DNS settings of the domain you want to employ on your registrar's site:
ns1.digitalocean.com ns2.digitalocean.com ns3.digitalocean.com Once you've washed that, from within your project/droplet on DO you'll need to add together the domain to Practise and set up at least two A records within DO.
How to Add together Domains | DigitalOcean Product Documentation
Add a domain to your DigitalOcean business relationship to manage its DNS records from the control console and API.
![]()

- thenameofyourwebsite.com
- www.thenameofyourwebsite.com
This ensures you'll exist redirected appropriately no matter what people put into their web browser.
Step #3 - Initialize Your Server
Here is where I went wrong in my first attempt, at least for creating multiple blogs/sites on a unmarried droplet. DigitalOcean has a 1-Click Ghost App Deploy set up upwardly in the marketplace and I just used that.
Information technology works if you lot but want to create one site on your droplet. I wanted at least two, possibly more equally I move some old wordpress sites over to ghost.
My fault was non doing this myself and setting upward users for each site. I used the root user instead, don't do that if you want multiple sites.
In fact, you shouldn't really do that even if you don't want multiple sites on one droplet. Yous should notwithstanding set upward a user with superuser permissions and apply that instead.
The post-obit is only partially correct in what nosotros want but you should still read it. I didn't on my first endeavour and regretted information technology.
Initial Server Setup with Ubuntu 18.04 | DigitalOcean
When yous first create a new Ubuntu xviii.04 server, there are a few configuration steps that you should accept early on as role of the bones setup. This volition increment the security and usability of your server and will give y'all a solid foundation for subsequent...
![]() DigitalOcean
DigitalOcean
Don't code along with that guide, I recommend coding forth with me below. There are some differences.
Step A: Login to Your Droplet/Server
The '$' in these tin can be omitted it'southward only a common way to write out the input of the terminal. Experienced developers will know this, beginners might be dislocated.
$ ssh root@your_server_ip So you lot're going to go a couple of questions:
Are yous sure you desire to continue connecting (yes/no)? yes Warning: Permanently added '<ip_address>' (ECDSA) to the list of known hosts. You lot tin just blazon 'y' rather than 'aye' if yous want. If you are using SSH with a passphrase you'll exist asked for it and so brand sure you take it handy.
Enter passphrase for cardinal 'C:\Users\<you>/.ssh/id_rsa': <passphrase> It's probably a all-time practice for security but it's up to you to implement it or not.
Once complete you'll be logged in to your droplet as what's called 'the root' and prepare to get it gear up upward. A mildly entertaining caption:
Step B: Update The Server
$ apt-get update && apt-become upgrade This may take a while and you lot'll get a ton of lines printing off.
Footstep C: Add together a User
This example creates a new user called sammy, but y'all should replace it with a username that you want to use:
$ adduser sammy I similar to use acronyms for the domains I'm installing and I write the details down in my password manager.
You volition exist asked a few questions.
Enter a potent password and, optionally, fill in whatever of the additional information if you lot would like. This is not required and you tin merely hit ENTER in whatever field you wish to skip.
Step D: Make that User a Superuser
To unlock admin privileges for your new user we'll you'll need to practise the following:
$ usermod -aG sudo sammy Now, when logged in equally your regular user, yous can type sudo earlier commands to perform actions with superuser privileges. We'll need this, and we'll need to set up new users for additional sites per droplet in the same fashion.
Footstep E: Login every bit that User
$ su - sammy Step F: Install Nginx
Nginx ('engine-Ten') is a reverse proxy. Information technology's like the middleman between your Ubuntu (Linux) server and the balance of the internet. What makes the server do it'south thing based on the requests really. A better dorsum finish engineer can probably correct me on that.
$ sudo apt-go install nginx [sudo] password for sammy: Enter your password and allow information technology run. Then:
$ sudo ufw let 'Nginx Total' The 2d command allows HTTP and HTTPS connections. You lot should see a much faster confirmation on this command than the previous one. I don't know if that has relevance to any firewall but I've seen information technology mentioned a few times. In any case, this is what I did and it appears to accept worked correctly.
Step G: Install MySQL
Ghost databases use MySQL so this is what we'll demand. I'm far more used to postgreSQL and SQLite but they are all more than similar than unlike and then no big deal.
$ sudo apt-get install mysql-server Once installed if yous want to set a countersign yous'll need to log into the MySQL crush which volition look a little different in the terminal and we're switching to a structured query language (SQL) now:
mysql> Change USER 'root'@'localhost' IDENTIFIED WITH mysql_native_password By 'password'; Supervene upon 'countersign' with your stronger (stored-in-a-password-manager) password, but keep the quotations around your password or it won't piece of work.
You should see the following after you change your password successfully:
Query OK, 0 rows affected (0.00 sec) Then go out MySQL:
mysql> quit Step F: Install Node.js
And npm...
Node.js is the server side JavaScript engine that will run your ghost site. As I said in my last post I actually similar node.
Anyhoo, we're installing the latest stable 10.x version using a coil command.
$ curlicue -sL https://deb.nodesource.com/setup_10.x | sudo -E fustigate - One time that's done it will tell y'all something along the lines of:
## Run `sudo apt-get install -y nodejs` to install Node.js x.x and npm ## You may besides need development tools to build native addons: sudo apt-get install gcc one thousand++ make ## To install the Yarn bundle director, run: curl -sL https://dl.yarnpkg.com/debian/pubkey.gpg | sudo apt-key add - echo "deb https://dl.yarnpkg.com/debian/ stable main" | sudo tee /etc/apt/sources.list.d/yarn.list sudo apt-get update && sudo apt-get install yarn Yous'll want to run the first command at a bare minimum:
$ sudo apt-get install -y nodejs If you want to utilize the increasingly popular yarn packet manager you'll also need to run the yarn related code likewise. Only I'm happy with npm in this context and the residue of my instructions volition use npm too.
Anecdotally yarn feels a bit faster, just I don't know how much npm or yarn I'll ever exist using on this server so flip a money ¯\_(ツ)_/¯
Step #iv - Set up Ghost
The server is good to become, but y'all're not done yet if you want a ghost blog for your site.
We're going to use the Ghost-CLI command line tool to go Ghost installed and configured with the post-obit npm packet:
$ sudo npm install ghost-cli@latest -g It'southward pretty quick. Next you'll want to make a directory (mkdir) for your site:
$ sudo mkdir -p /var/world wide web/<yourblognamehere> Supersede <yourblognamehere> with any you desire to phone call this file to continue track of your new ghost web log or website.
And then you desire alter the owner of this new directory to the user yous created earlier:
$ sudo chown sammy:sammy /var/www/<yourblognamehere> Again, supersede sammy with whatsoever your username is and <yourblognamehere> with the name of your actual directory.
Prepare the correct permissions:
$ sudo chmod 775 /var/world wide web/<yourblognamehere> Then y'all need to navigate into that directory:
$ cd /var/www/<yourblognamehere> This volition change your prompt in the terminal to something like:
sammy@ubuntu-nameofserver:/var/www/<yourblognamehere> That terminal bit helps you know that you're in the right directory and it's important that you're in the right directory. I always double cheque where I am earlier I run commands. It will save you lot fourth dimension after.
From the directory (triple check information technology even):
$ ghost install Now you'll get a bunch of command line prompts:
✔ Checking organisation Node.js version ✔ Checking logged in user ✔ Checking current folder permissions ✔ Checking operating arrangement compatibility ✔ Checking for a MySQL installation ✔ Checking retention availability ✔ Checking for latest Ghost version ✔ Setting up install directory ✔ Downloading and installing Ghost v3.11.0 ✔ Finishing install process Followed by a bunch of questions:
- Blog URL → http://<your_domain_address>.com
- MySQL hostname → <default> hit enter
- MySQL username → root
- MySQL password → <your MySQL password>
- Ghost database proper name → <default> hit enter
- Do you lot wish to set "ghost" mysql user? → yes
- Do you wish to ready up Nginx? → yeah
- Do y'all wish to set upwards SSL? → aye
- Enter your email (For SSL Document) → <email_address_you_want_to_use>
- Exercise yous wish to ready upwardly Systemd? → yep
- Do you desire to kickoff Ghost? → yes
You'll get some check marks, with some other stuff along the style and hopefully everything goes smoothly for you lot.
I forgot to change my A server name stuff considering I was moving an existing domain from one droplet to a new one. This led to an fault on the SSL certificate portion, and information technology took me too long to effigy out where I screwed upward. Basically Lets Encrypt timed me out for too many requests and I had to wait an hour to gear up that part earlier my site was live.
Lets Encrypt is a gratis SSL service that lets you run secure https:// connections. You'll need it if you lot want to employ Stripe via Ghost memberships or whatever payment processor for that matter. But information technology's also just a generally skillful exercise these days.
The Ghost-CLI documentation is your friend if yous go stuck or take to troubleshoot any errors.
Now apparently if it goes smoothly it will prompt you to visit yourblognamehere.com/ghost but mine didn't. I previously knew I had to exercise this, and so yous but navigate there in your web browser to go the ghost admin gear up so yous can start writing and playing with your site live.
Choose your theme brand your changes and Bob's your uncle. If yous merely wanted one blog, adios amigo!
If not, keep reading...
Footstep #5 - Adding Additional Ghost Websites
Here is where things get a little trickier...
You'll demand to logout from your current user situation (sammy in the example higher up) which is ctrl-d or you lot can elementary type:
$ logout Make sure you're using root so you lot should see something similar:
root@ubuntu-nameofserver:~# Every bit your command line prompt. Or if yous created a site and are merely logging dorsum into your server it should likewise take your right to root.
Pace A - Create Some other New User
To quickly reiterate:
$ adduser janey Brand that user a super user and so that they have admin privileges:
$ usermod -aG sudo janey Login as that new user:
$ su - janey Step B - Set Upwards MySQL for New User
Open mysql this time with a slightly different command:
$ mysql -u root -p When prompted submit your MySQL countersign from before (this is why you put these things in a safe place). We're going to use the same MySQL database here substantially merely you need a divide user to keep your ghost websites separated.
Now that you're in the MySQL beat nosotros need to create a new user. Again, replace janey with any you lot want to employ* as your username and the password with whatsoever you lot desire to utilize to secure it:
mysql> CREATE USER 'janey'@'localhost' IDENTIFIED Past 'password'; Recall don't remove the quotes, they are needed in SQL queries and you should get a 'Query OK' response.
*I simply used the same username for MySQL that I did for for my server user to proceed things organized but I have a feeling this is non a best practice.
Next brand sure yous grant this new user the appropriate privileges and assuming you get a adept response, you lot tin can go out MySQL with ctrl-d or type 'exit':
mysql> GRANT ALL PRIVILEGES ON *.* TO 'user2'@'localhost'; Query OK, 0 rows affected (0.00 sec) mysql> exit Step C - Set Up Another New Directory
Similar to before y'all'll need a new folder for your new ghost install.
$ sudo mkdir -p /var/www/<yoursecondwebsitenamehere> Make sure change the owner of this new binder to your current user (second one):
$ sudo chown janey:janey /var/www/<yoursecondwebsitenamehere> And grant yourself the right permissions:
$ sudo chmod 775 /var/www/<yoursecondwebsitenamehere> And so navigate into that directory:
$ cd /var/www/<yoursecondwebsitenamehere> Make certain you lot use your usernames and your site names rather than the ones supplied here.
Stride D - Install a New Instance of Ghost
Once hither you'll run the same command as before to install ghost but there will be several changes from the get-go fourth dimension you did it because you're putting it on the same droplet every bit the previous one:
janey@ubuntu-nameofserver:/var/www/<secondblogname>$ ghost install I'm just showing you how the command line should wait in that example. The control is simply ghost install because nosotros already npm installed it on the root.
This time after you get all your prompts answer the post-obit questions similar then:
- Blog URL → http://<your_second_domain_address>.com
- MySQL hostname → <default> hit enter
- MySQL username → <janey> (*or whatever your 2nd username was)
- MySQL countersign → <janey's MySQL password>
- Ghost database name → <default> hitting enter (*it creates a new db name for you)
- Practise yous wish to prepare "ghost" mysql user? → No (*It should skip this...)
- Practice you lot wish to set up Nginx? → yeah
- Do you lot wish to set SSL? → No
- Enter your email (For SSL Certificate) → <email_address_you_want_to_use>
- Do yous wish to fix upward Systemd? → yes
- Practice you want to start Ghost? → No
Observe the three No'south this time? That's really of import and you'll run across why in a minute. We need to brand some changes to this Nginx configuration file before we fix up the ssl certificate and starting time ghost on this site.
Footstep East - Change 2d Site'south Nginx Configuration
Navigate into your Nginx configuration (config or conf) directory:
$ cd /etc/nginx/sites-enabled/ Then make sure you cease your Nginx server:
$ sudo service nginx terminate *Annotation: This control volition make the server of your first site unavailable until your restart it once again.
Open the Ubuntu nano terminal editor and modify your secondblog file:
$ nano <secondblogname>.com.conf You can use the 'ls' command to list the conf files in this folder if you forget what y'all named the file exactly.
Change the <port> number (probably a 4 digit number currently) of the proxy_pass to an unoccupied but valid port number.
Y'all may have to troubleshoot this if you guess wrong, certain ports will exist occupied just pretty much any 4 digit combo should in theory work equally long as information technology wasn't the existing one.
... location / { ... proxy_set_header Host $http_host; proxy_pass http://127.0.0.1:<port>; } ... *Remember the port number you choose you'll demand it over again in a minute.
Y'all don't want two sites going to the same place if they are different sites, and so yous can't skip this pace. If you configure this wrong, you lot'll likely exist directed to site number ane. Continue that in mind if you accept to troubleshoot it after the fact. I'd first hither with the port number.
When yous hit ctrl-x to go out it volition ask if you desire to salvage. Make sure you say 'yeah' and so hit enter to confirm the salvage before you exit.
Footstep Due east - Restart your Nginx Server and Ready the SSL
Outset your server again:
$ sudo service nginx kickoff So navigate back to the second site directory:
$ cd /var/www/<secondblogname> From here you lot'll have to open nano again on the config.production.json:
$ nano config.production.json And make sure you alter your config on the port to match any port you created on the second sites port:
... { "url": "http://<secondblogname>.com", "server": { "port": <newportnumber>, "host": "127.0.0.1" }, ... Obviously put the port number you chose from earlier for this new set-up.
At present y'all can ready the ssl with a special command from ghost-cli:
$ ghost setup ssl Assuming everything goes smoothly y'all can now commencement ghost for your 2nd site:
$ ghost start Now everything should exist good to go on yoursecondsitenamehere.com/ghost for you to walk through your admin ready and get that site up and running in a similar manner to the first. It's pretty self-explanatory.
If for some reason you encounter a roadblock I encourage you lot to checkout the incredible ghost documentation.
Finishing Upward
Phew...long article...
Alright that'south information technology, I now have 2 ghost sites (working towards at to the lowest degree ane more) up and running on one DigitalOcean droplet. Google analytics confirms that people can google them and other visitors accept been this week.
At present I have to figure out how to force https:// without whatsoever errors...
Any suggestions?
Source: https://darrenbeattie.com/how-to-host-multiple-ghost-sites-with-one-digitalocean-droplet/
0 Response to "Digital Ocean Run Ghost Setup Again Within a Folder"
Post a Comment